It is suggested that you visit https://astonuts.free.fr/ as that site has some very useful and interesting information
Several members of the Aston Martin Feltham Club have given their experiences with tyres.
The PDF file is a summation of these contributions. To get the file click HERE
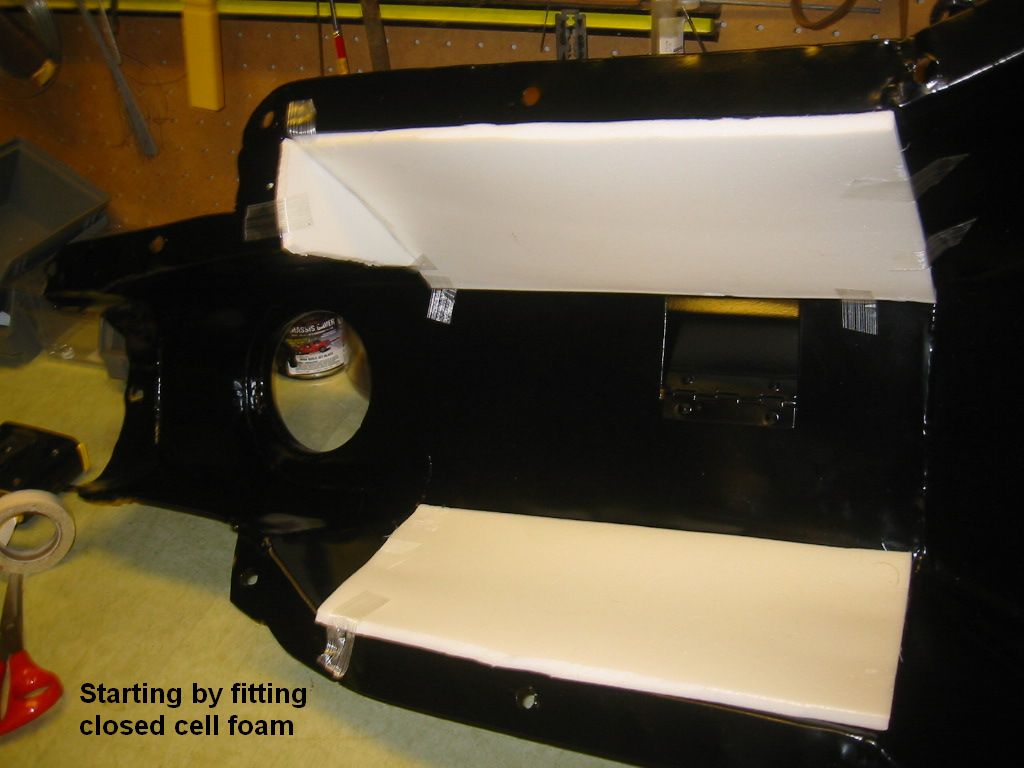
When I built my MGB GT V8 to factory specifications (they made 2,591 of them) I was determined that it would be quiet in the cockpit as, after all, it had gained the reputation of being the poor man’s Aston Martin. As someone who had done a bit of acoustics at university I realised that the material from the various purveyors of soundproofing kits offered were nothing special. It did not take long to find that the polymer bitumastic material with an aluminium on one side and aggressive glue on the other was nothing more than that used by the construction trade for roofs. The cost is in the region of $1 per square foot retail against $8 from “soundproofing” material suppliers. The closed-cell high density foam also offered was again readily available – from your local auto-body shop. It is the same foam as used on car roofs for those vinyl roof jobbies. The foam goes under the vinyl just like an underlay. – again cost is somewhere around $1 per square foot. And for heaven’s sake do not let any one out there convince you that their stuff is any better. If you know anything about acoustics you will know that their claims are fatuous
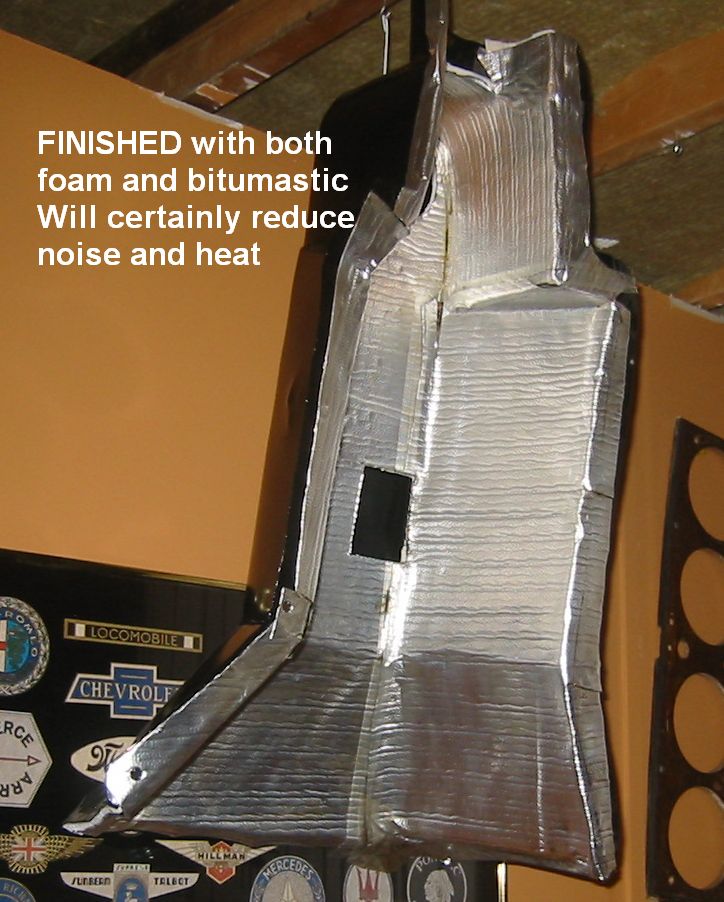
So the Aston is getting the same treatment. Using both the foam and polymer bitumastic materials will give the considerable heat and sound resistance. I intend to do all the various areas such as over the petrol tank, the floors, the foot wells and the roof. The roof is very important as it acts as a reverberator like the “Crown” in Canterbury cathedral. I had to cut the foam to fit the ins and outs and this was quite difficult. I used Goop as a glue because I am not quite confident with my previously used 3Ms spray on contact stuff. It also allowed some movement before setting. However, it is important to use clamps as setting takes while.. When all the foam was fixed I began to apply the polymer bitumastic material and here I hit a snag as it had been laying around for over six years. The aggressive glue had turned into sticky black plastic. But I found that applying thinners restored the glue although not to its previous aggression!
As you can see the result is a cover that will cut the sound down considerably and the aluminum foil will reflect the heat away. The foil will not be attacked by oil or grease and will clean down easily. Possibly I will buy new roll of bitumastic as restoring with thinners is a bit messy.
PLEASE NOTE THAT THIS IS CURRENTLY UNDER REVIEW AS IT MAY NOT HAVE BEEN USED IN SOME CARS
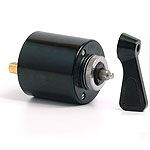
Every car manufacturer uses bought it parts from Lucas, Girling, Salisbury and such. So a part may be used on several different cars and this results in different parts suppliers charging different retail prices for the same part. This leads to a wide range of retail prices, so if one is restoring it is important to shop around. Problem is that it is difficult to match a manufacturer’ part number to a car maker’s number. One part proved difficult to find was the indicator switch used on the DB 2/4s – part number 51431. There was a lot of substitution by previous owners – mine was a sort of three position light switch. But happily we acquired a Lucas 400E manual and a rumour that it was a Lucas part struck gold. The Lucas part number as used on may cars is 31250 TPS 1 and one is the MGA. So if you want one you can order one from Moss Motors (part number 162-400) or other suppliers.
Barrie Robinson AMFC
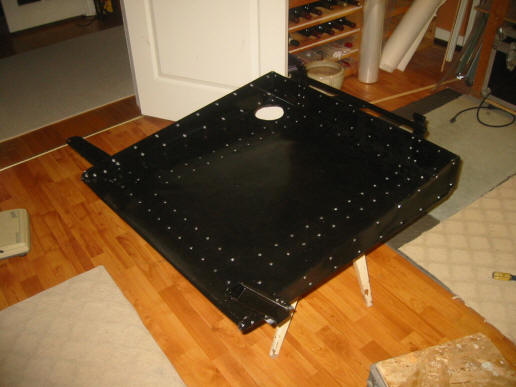
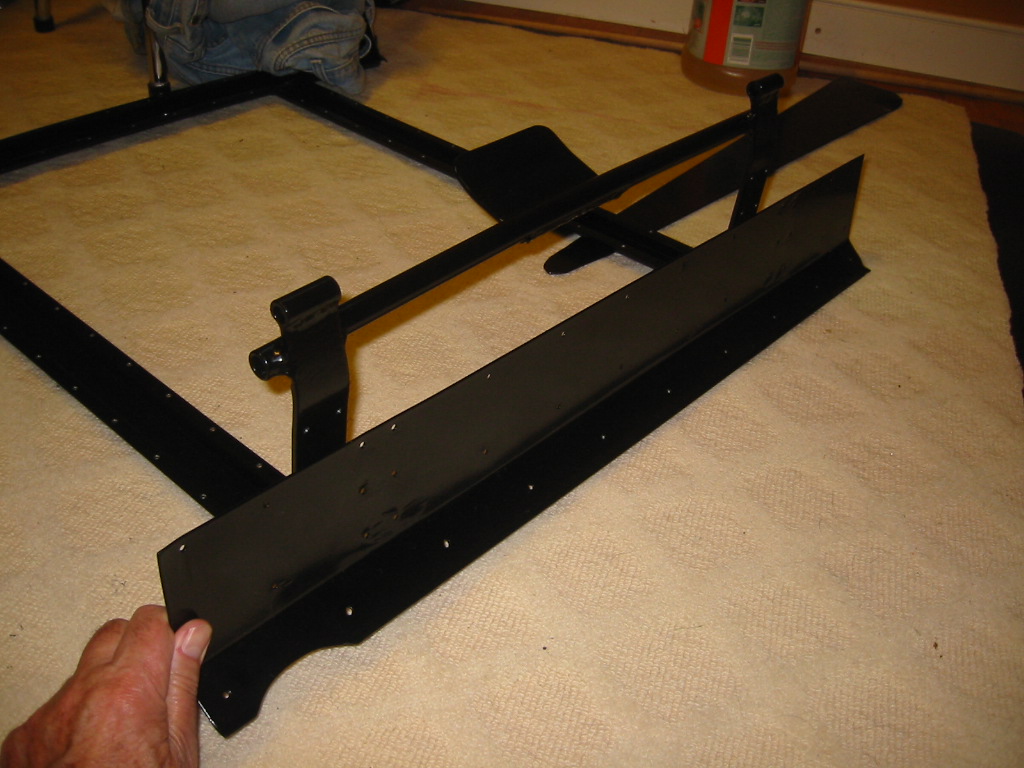
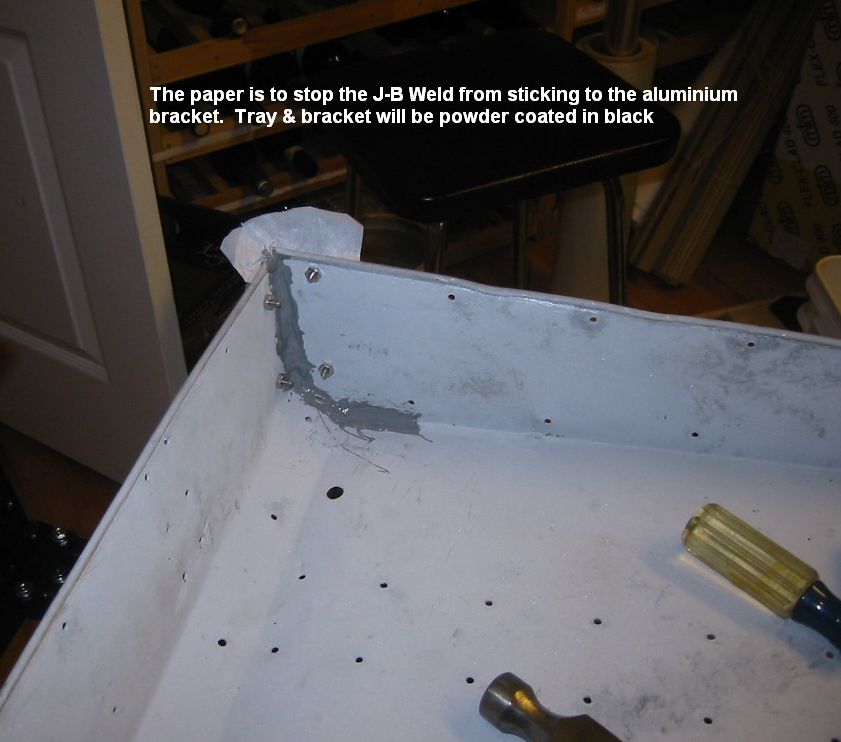
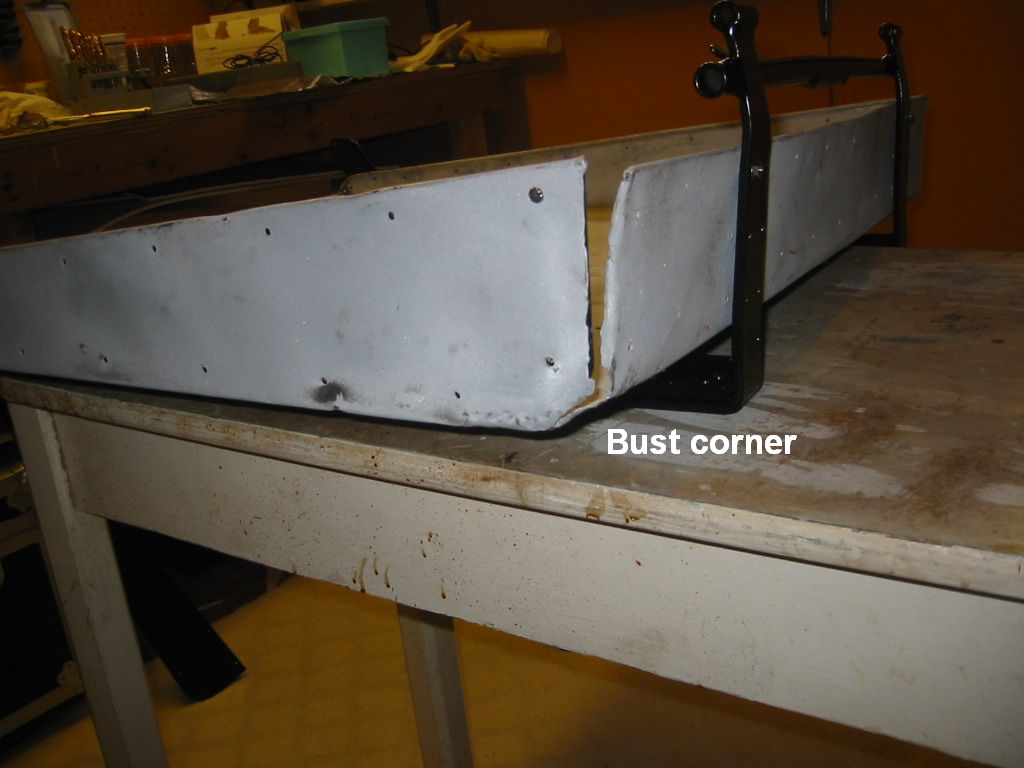
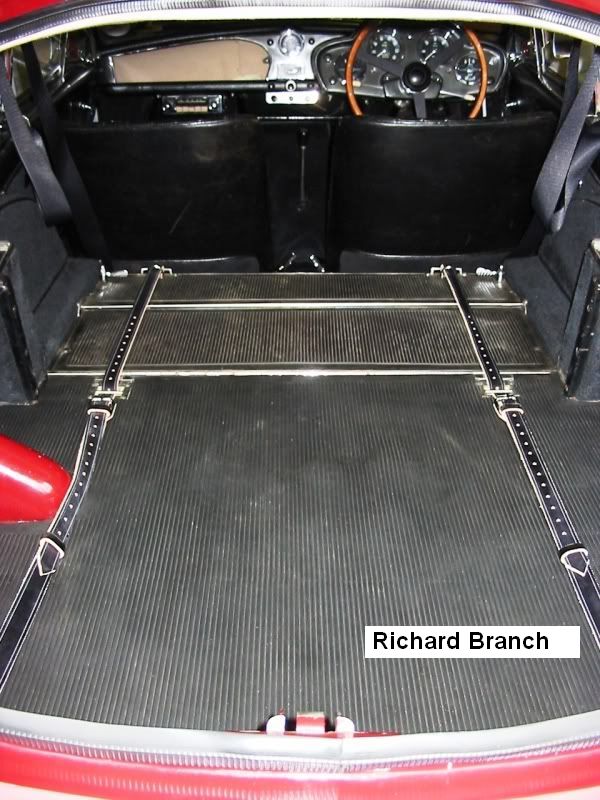
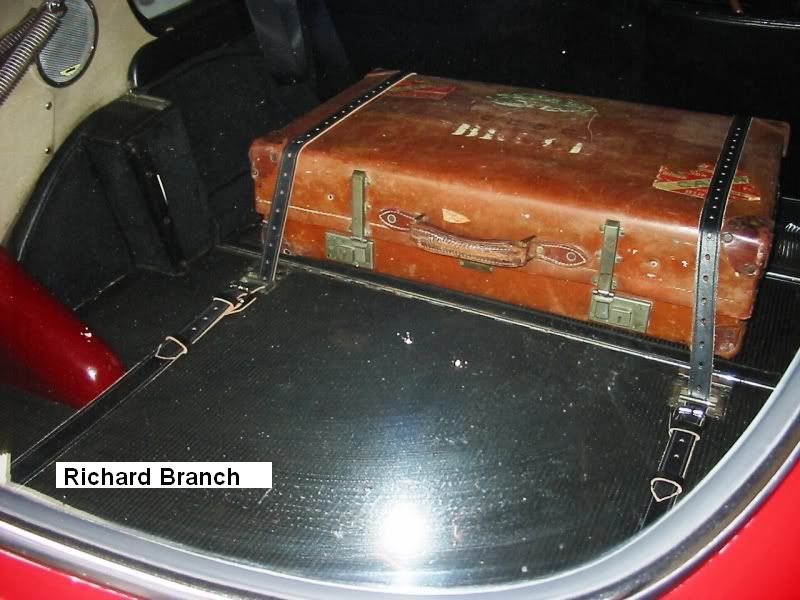
It seems that this item, like many other, varies from model to model……and probably from car to car. Mine was quite considerably beaten up and the steel rack which cradled the tray was a nice brown speckled rust colour. Taking it to bits was a chore as it was riveted like there was no to-morrow – 166 rivets in all. I had to use an angle grinder on some rivets, while others just sheared off with a big screwdriver and a FBH. When apart, I had the rack powder coated, black of course, but the tray was another matter. The corners had split and my friendly welding expert could not mend it as it is made out of magnesium-aluminum alloy. He tried everywhere but could not find any welding rods for this alloy and all attempts using other rods failed. But he did straighten it out. The tray was soda blasted to clean it up and then I used that metal weld goop, J-B Weld, to repair the corners. I was told that powder coating would adhere to it as it had metal content. And when it came back from the powder coating shop – it had! Thanks to many photos I assembled the bits and I hasten to add this was more difficult than one would suppose. Because of the bashing, the holes did not line up, but judicious use of a drill fixed that. I used stainless steel nuts and bolts – all 166 of them. These are violent overkill I know but I do not have the tools to do proper rivets – and pop rivets are ugh! It now looks rather splendid, vastly over-engineered but definitely splendid.
Barrie Robinson AMFC
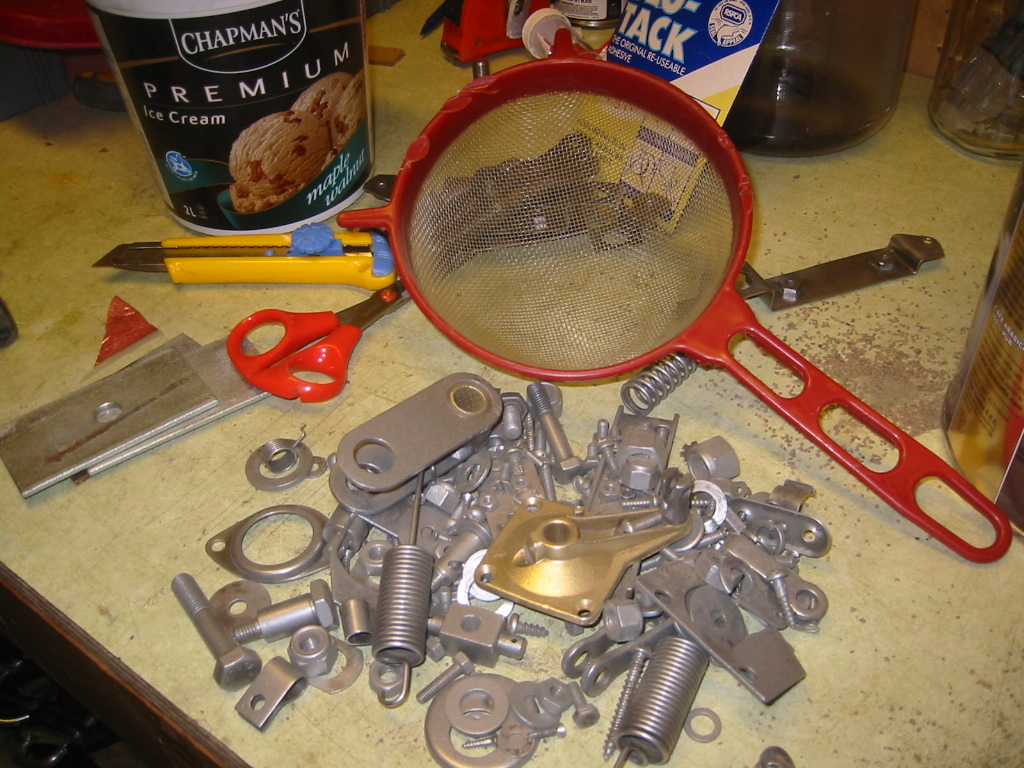
One of the nasty chores when one is in the restoration process – not quite as nasty as forking out hard earned gold, but definitely nasty. When I restored my Austin Healey I hand cleaned every nut and bolt because I wanted the car to got back together as really really original – so no new strange fasteners. I also wanted them cadmium plated and thus they have to be nice and clean. So when I started on the DB 2/4 I realised that replacing BSF nuts and bolts was going to expensive and sometimes there are no replacements available today. But this meant another arduous task confronted me. In a flash of brilliance I bought a tumbler thing through a not very co-operative Harbor (sic) Freight. They will not ship to Canada for some unreasonable reason (I get tons of auto parts from other US companies).
I found I could buy big bags of silver (silica) sand and crushed walnut shells for disgustingly lower than touted by the “grit” suppliers. Sand from a building supplier and walnut shells from the pet store. I kid you not – the pet store! They sell it as kitty litter and is cheap !
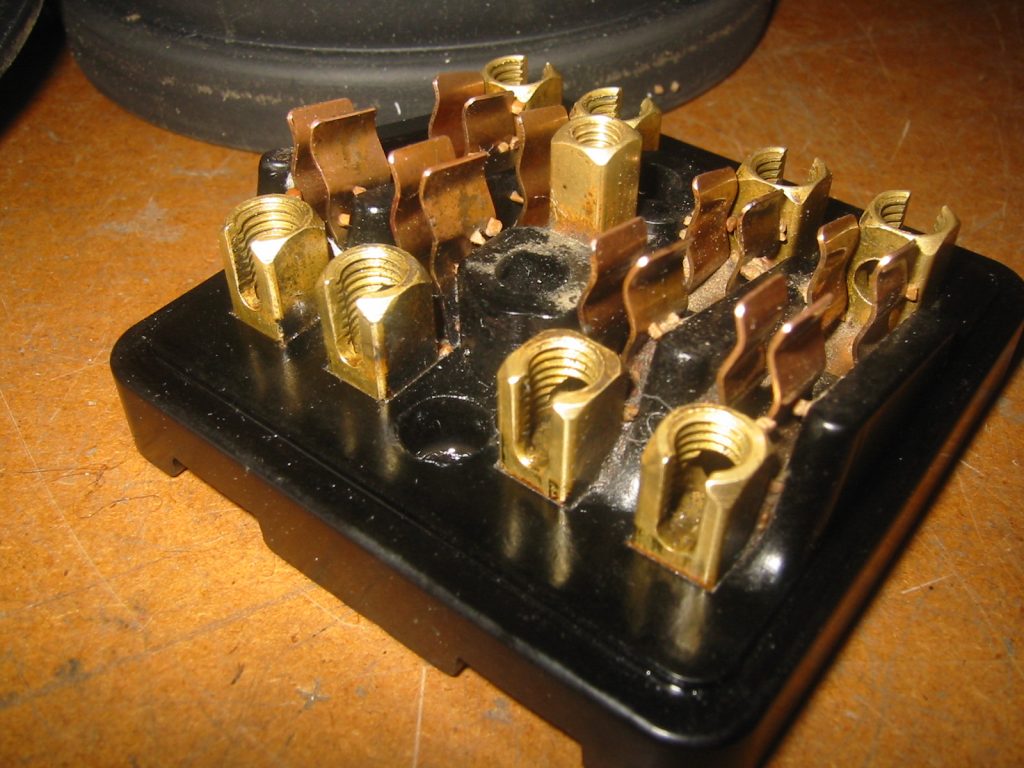
My first tumble was a bunch of bolts and their accompanying nuts. The result was brilliant as the photo shows, so I did more including various other bits. I did know that walnut shells polish rather than clean and obviously less abrasive. So I tried it and the result was nicely polished bits. However, cadmium plating does not require this treatment and I looked around for other stuff, I had taken the fuse holder cover off to find a very scruffy inside. So I tumbled it in walnut with very satisfactory results. So good, in fact, that I need not buy another. The most interesting point is that bakerlite/plastic base came up like new. I have been using “Great Knob” (www.britcot.com) to restore bakerlite with great results, but the tumbling seems to do just as well. It seems you can chuck in an electrical part and, while not damaging “soft” parts, it will buff up the brass and other metal parts.
My Harbor Freight tumbler, 2 6lb drums, died after about 100 hours so I got a new one. It was more expensive than the HF one and I thought it would be better – it is not! It has not broken down yet but it is crude – doesn’t even have an on/off button.
But I thoroughly recommend this method with the proviso you get a good unit – one you can return easily if it breaks.
Barrie Robinson AMFC
Oil Filter Assembling – all cars fitted with cartridge filter
Submitted with written permission of Chris Adams of Four Ashes Garage, 2011. This document cannot be copied or altered in any way without permission of the author.
Often we come across incorrectly assembled oil filters, even by other garages.
This often involves not fitting the bottom sprung loaded filter plate (it sticks to the filter & people don’t realise) or just not assembling it right. We keep most of the parts for the filters in stock.
The filter bowl should be clean with no grazes or scratches to the rim, and a flat face where the filter bolt locates, if it is bent inwards it needs straightening using a round flat ended form tool of about 7/8″ or 22mm on the inside & a press or vice.
Once the bowl is flat make sure the bolt still goes through the hole.
The bowls on an Aston are painted a very pale green which we have made up for us, this should carried out if required before fitting. (we offer exchange filter bowls painted in the correct shade of green in 2 pack paint)
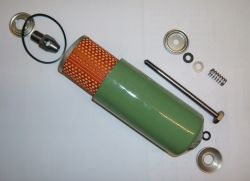
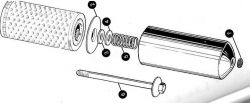
From drawing / photo no 2 – Fit the bolt through the shaped stiffening plate (about 4mm thick), put thick rubber O ring (7)- this should be a square section rubber ring but thats not available any longer, on the bolt (6) then put the bolt / plate through the filter bowl.
Inside the bowl fit the spring (5), this is just a little bit larger on the ID than the bolt, then fit the 3/8″ x 7/8″ OD flat washer (4) & then the flat rubber seal (3), this presses up against the lower filter plate (2)
Carefully fit the little horse shoe clip if there is one to the filter bolt, it fits in the groove on the bolt.
The filter fits next or lastly.
Change the filter ring in the head using a sharp point to flick it out, make sure that you have the correct filter ring – the thin rectangular one fits DB5 to DBS 6, this is marked with xxx paint, the thicker one marked with xxx paint is for DB2 to MkIII.
Shown in the 1st photo is how they should be assembled from the head on the top left to the the bolt on the mid right.
Chris Adams
Four Ashes Garage
http://www.fourashesgarage.co.uk
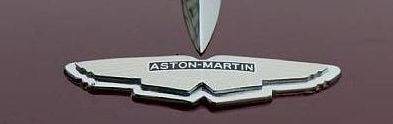
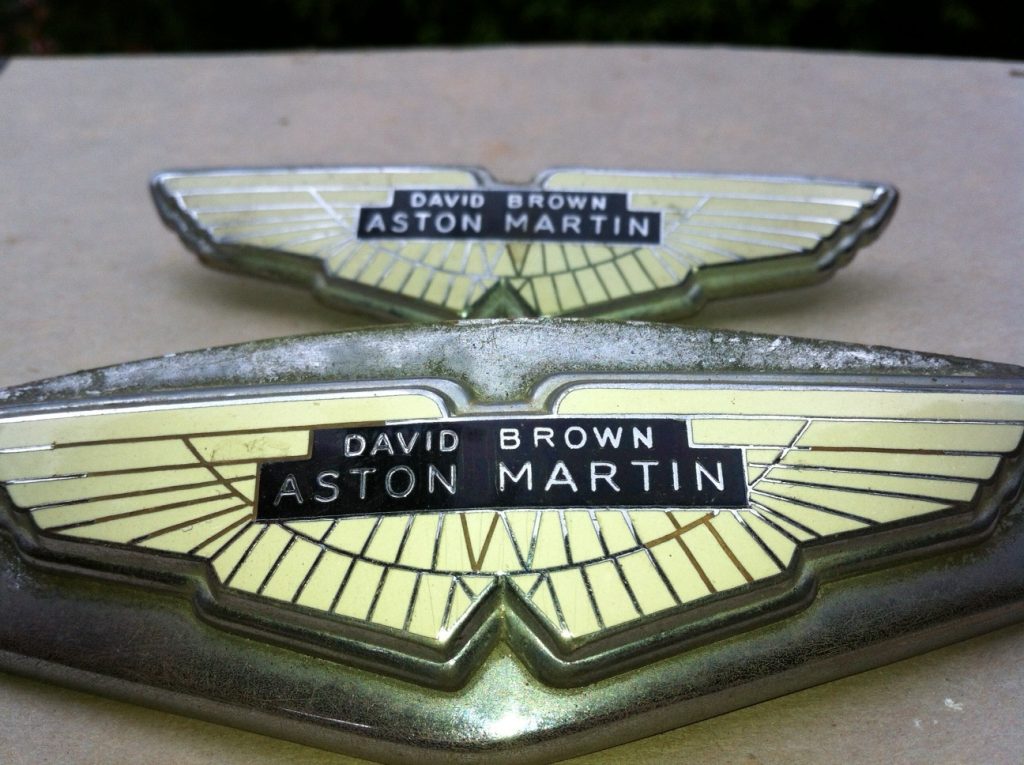
After much discussion the membership have arrived at what is considered the correct badges for the Feltham cars. This in relation to badges bearing “David Brown” and those not having this illustrious name.
The application is a follows:
DB2 -No David Brow
DB 2/4 MkI – No David Brown
DB 2/4 MkII – With David Brown
DB 2/4 MkIII – With David Brown
There is the question of when the plinth was added. From the photos one will see that some badges had plinths so more research is needed. The outfits that make new badges cannot always make the badges with plinths or repair any of the badges.
One of the difficulties with finding which badge goes with which model is that the Aston factory were not scrupulous in keeping parts strictly within a model range. Also the incorrect badge may have been used in restoration, or after some yobbo had stolen the original off the vehicle while parked. The usual manufacturer of these badges is J.Fray Ltd. It has been said that these badges can be repaired by dentists or by mixing nail polish to the right colour, applying then smoothing it down carefully with sandpaper/steel wool. But it these methods may not be very appealing to the fastidious.
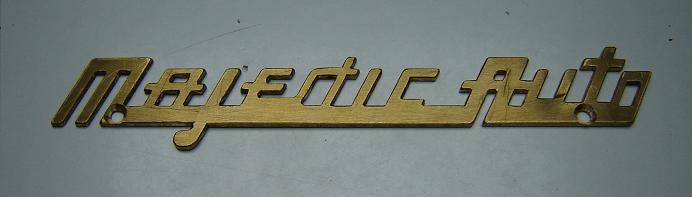
For those who have a DB 2 or DB 2/4 MkI sold new in France, It would have had the Majestic Auto badge installed under the rear registration plate. So if you have bought such a vehicle and are short of the Majestic badge you are in luck. Alban Chaignon has re-manufactured the original badge from the information that he has gleaned from a few sources. These badges were fitted on the car when it was sold as new and “Majestic” was notated on the original build sheet as the “Agent”. Thus a correct restoration will need the Majestic badge.
Alban can supply the brass badge for 60 Euros but the purchaser has to have it chromed.
There has been some activity within the AMF Club regarding which is the correct jack that fits which model. Rather than composing a section here it would be far better to give the directions to a most comprehensive source as below
https://astonuts.free.fr/PAGES/2-4tools_E.html
This site is highly recommended for all sorts of information on the Feltham built Aston Martins
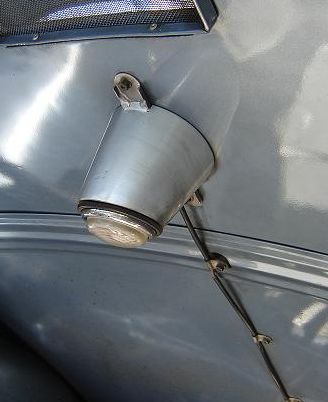
Some cars had an under bonnet lamp and replacement parts seem to be scarce. But Affair de Steel has made a couple for me. Their URL is http://affaire-de-steel.com.
Prices were as follows:
1 aluminium lamp = 110 € + 20 % Vat
5 aluminium lamps = 440 € + 20 % Vat
Alban Chaignon AMFC
| MODEL | YEAR | PRODUCTION DATES | TOTAL UNITS | SALON | DROPHEAD COUPE | FIXEDHEAD COUPE | OPEN SPORTS | OTHER | ||
|---|---|---|---|---|---|---|---|---|---|---|
| DB1 | 1948 | Sept 1948 to May 1950 | 16 | 13 | 3 | AMC/48/1 | SAMC/50/15 | |||
| DB2 | 1950 to 1951 | May 1950 to Apr 1953 | 411 | 308 | 98 | 5 | LMA/49/1 | LML/50/406 | ||
| DB3 | 1952 | Sep 1951 to May 1953 | 10 | 10 | DB3/1 | DB3/10 | ||||
| DB 2/4 MkI | 1953 to 1954 | Oct 1953 to Oct 1955 | 565 | 451 | 102 | 12 | LML/501 | LML/1065 | ||
| DB3S | 1954 | 1953-1956 | 31 | 3 | 28 | DB3S/1 to DB3S/101 | DB3S/11 Works carDB3S/120 | |||
| AM300/1101 | AM300/1299 | |||||||||
| DB 2/4 MkII | 1955 to 1957 | Oct 1955 to Aug 1957 | 199 | 145 | 16 | 34 | 4 | |||
| DB 2/4 MkIII | 1957 to 1959 | Mar 1957 to Jul 1959 | 551 | 459 | 85 | 5 | 2 | AM300/3A/130C | AMC300/1850 | |
Take a bottle of acetone (bought at a paint store) and mix it 50/50 with some ATF. Put it in a squirt bottle and you will not find a better penetrating solution in the world. Nuts will be butter in your hands, guaranteed. The acetone will evaporate if not sealed tight so storing it in its spray bottle is only good for a day or two before the mix gets out of ratio. The acetone crawls and carries that ATF into places not thought possible.
Bill Jacobs AMFC
There have been some incidents of hub failure on Aston Martins particularly when being used on the track.. Because of this frequency it was apparent that a more robust hub was required. Pulse Engineering Ltd have taken over the remanufacture of hubs to the old Andron Engineering (Andy Hodge) specifications, which offer a much higher level of durability. It was found that the the wall thickness from the core of the thread to the inside diameter was too thin. So the new hubs have a thicker wall. The steel now used is High Tensile EN24T instead of the old low grade Mild Steel material. Since the inception of this new hub we are not aware of any failures. Pulse Engineering also makes suspension parts and these are CNC machined from billet stock instead of cast aluminium. Please see the website at www.pulse-racing.co.uk for details.
Darren Davies
Pulse Engineering
These kits will fit the CB type Master Brake Cylinder
SP1974, SP1206, SP1207. SP1985, SP1989.
They all fit that 1 inch bore cylinder. If you have trouble finding one the kit is also used on Land Rover models 107& 109 (long wheel base) from 1954 to 1966.
The PowerTrack banner is on the Parts and Services page – They have Girling stuff.
David Price AMFC
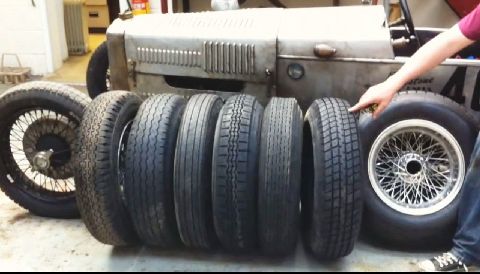
DB Aston Martins, are arguably the best sports cars of the day, and until 1962/3 they fitted the same size tyres as all the other top marques such as Ferrari, Maserati, Jaguar etc. Because this size is needed for the best cars, Michelin set themselves the task of manufacturing the best possible tyre.
With these 50’s performance cars in mind they produced the Michelin Pilote X 600WR16 which is a tall period looking tyre designed to keep steering light with a tread pattern that can move water efficiently. The Pilote X has rounded side walls with writing on the side designed to look like tyres of the period yet built with the best modern tyre manufacturing technology to keep the road noise down to a minimum with brilliant handling characteristics.
The Dutch company Vredestein make tyres in this size. Vredestein tyres are proving very popular with the XK Jags as a cheap tyre but this tyre only has an H-speed rating (130mph)
Importantly with classic cars a tyre should be designed to give you, as the driver, the feed-back you need to make the experience of driving your car pleasurable, instead of the numb experience you could get if your car ends up fitted with a modern tyre carcass designed for power steering and modern suspension.
Michelin also still manufacture the original radial tyre – the Michelin X. This tyre is closest to the original cross ply in shape and will keep your steering as light as is possible when fitting a radial. The Michelin X is its own worst enemy in that they last for ever and people may well have driven on a tyre that is 50 years old! The Michelin X is available at the same price as the Vredestein and for a more steady driver (speed rating 112mph) is a very nice option, keeping the handling the way it should be while at the same time being gentle to your wallet.
Avon make the TurboSteel – another good sporty option. If you want to slightly lower your car and have a big foot-print the Turbosteel is for you. Considering Aston’s long standing relationship with Avon the TurboSteel was tempting until Michelin produced the Pilote X and the re emergence of the Pirelli Cinturato gave us better options.
Cross-ply tyres are still just right for some. Where originality is important, Fitting cross-plys will keep your steering good and light and they also give a very comfortable smooth ride. Directional stability is the issue for cross-ply tyres and at cruising speeds they tend to wander. This is unavoidable by the nature of cross-ply construction, no matter what wild claims some manufacturers may make. If its cross-ply you want there is no doubt it needs to be Avon TurboSpeed 600H16 as it is the tyre your cars left the factory on.
You wouldn’t give Marylyn Monroe, Marge Simpson’s hair style. So the exciting news for cars such as these is the re-mergence of the Pirelli Cinturato 185VR16. This is the only genuinely period tyre available in this size with a suitable speed rating (V 150mph) this was a hugely famous tyre in Europe and it was the upgrade tyre as it had the advantage of being a radial tyre but it was also progressive so it was the perfect tyre for road and track, just like an Aston.
These Cinturato’s have just become available again exclusively through Longstone Tyres (www.longstonetyres.co.uk 0044 1302 711123). there is a special offer on the Cinturato’s. The Boys at Longstone will ship them free of charge, and if you mention your an AMOC member you will get a club discount.
This instruction set has been composed by an Aston Martin Feltham Club member and is based on experience with a rebuild. Any enquiries can be made to the Club.
As the article is four pages long it has been set up as a PDF file – Click HERE to get the file
ASTON MARTIN FELTHAM CLUB – A worldwide club for owners of DB2 & DB 2/4 Aston Martins